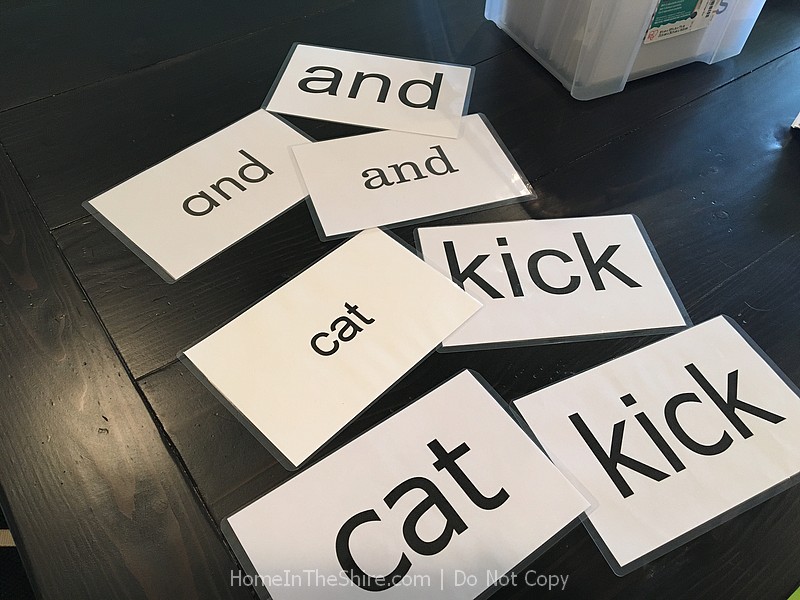
Fast Flashing to Teach Reading – Flash Cards
Even before we started Lily on a neurodevelopmental (ND) program through ICAN, I was using flash cards with her. This is one area that I think is confusing for parents new to an ND program. There are a few different types of flash card activities, such as receptive picture cards, language cards, and word cards, with various interpretations and even different names for these card activities.
- Picture cards – you are just rapidly showing pictures and giving the child a word to associate with each picture. The goal is to build vocabulary, not teach them to read. You are not showing words, just pictures. This is a fast flashing activity, done in short, frequent sessions each day. I think in the Doman world, the equivalent might be bit cards or bits of encyclopedic knowledge cards.
- Language cards – photos, preferably featuring the child. The goal is to help them develop functional phrases they can use to get what they want and need. In this activity you take your time, encouraging the child to actually say the word or phrase. This is not a fast flashing activity, and again you are not trying to teach them to read with this activity. You are typically not showing them words, just pictures. The photos and phrases will be personalized to your child. For example, we had a photo of Lily with her arms raised, and the phrase we were teaching was “up please.” When we moved to 3-word phrases, it became “want up please.” I’ve posted about these before in my Speech and Language Cards post. I often make laminated flash cards so they are more durable, but for our last batch I simply printed 4×6 photos and wrote on the back of the card for my own reference.
- Word cards – This is what most people think of when someone says “fast flashing” or talks about flash cards. These can be text only (which is what the Doman method suggests) or can have text on one side with the photo on the other side. I use both, word only, and word/photo, and I’ll share in this post a little more about both. This is the flash card activity I’m focused on in this post. This is the only flash card activity where the purpose is specifically to teach her to read.
What is Fast Flashing?
I should probably explain what I mean when I say “fast flash”. Basically it’s a technique for teaching kids to read. More specifically, it is teaching kids to recognize words on sight. It is incredibly effective, and I know many parents of children with T21 who use it with great success. But what is it? It’s showing flash cards rapidly. The key is to keep the sessions short and intense. My goal with Lily is 1 minute sessions at least 4 times per day, separated by at least 15 minutes between each session. I show a stack of around 10 cards during each session, retiring them to our “review” stack as she masters them or after about a week. It is more important to input lots and lots of words than to make sure your child masters every word you show them.
If you read How to Teach Your Baby to Read by Glenn Doman, there is a very specific method suggested involving gigantic red letters and keeping careful record of which words you’ve shown and a schedule for introducing them. However, I found it to be overwhelming and as with many other things, the simpler something is to implement, the more likely I am to do it. So, after some research, talking to other moms, and thinking about it for too long, I implemented fast flashing with Lily, and she amazes me with how quickly she picks up new words.
With fast flashing, and with most therapy activities, the simpler it is to implement, the more likely I am to do it. It is far better to just do it, than to worry about doing it perfectly!
We were at the beach a couple summers ago, standing in front of a bike shop. She kept pointing into the window saying “sun” and looking at me expectantly. I couldn’t figure out what she was doing. Well, on one of the bicycles the word “sun” was printed on the bar! She was reading to me! She constantly reminds me not to underestimate her.
Flash Card Options
When looking at flash card options you must first decide whether you’ll go with word only or opt to put a photograph on the back of the card. Personally I like the photograph on one side because I think it adds interest and increases knowledge. It’s also the default format of BrillKids flash cards, which I’ve used extensively. Once you decide this, you have two basic options: buy flash cards or make them. I’ve purchased some, but for the most part I make my own flash cards because I wanted a specific format with photo on the back and word on the front. Many of the cards you can buy are drawings vs actual photographs. I think photographs are more effective than illustrations. And, often the text is very small. Once we started actual books we started flashing cards with just the word, but Lily loves her cards that have a photo on the back.
How to Teach Your Child to Read with Fast Flash Method
There are plenty of books and websites that go into great detail on this topic, so I’m going to simply share with you how we do it. What better way to do that than to show you a video of a fast flashing session. My goal is four 1-minute sessions a day, but honestly I rarely meet that goal. For my word/photo cards, I take a stack of them and flash word/picture/word, saying the word each time I flip the card. Sometimes I just flash the picture or just the word and then turn the whole stack on the next repetition. It’s easier to go quickly if I show just one side of the card and then go back through showing the other side. I try to repeat the stack at least twice per session. When I’m showing word cards with no picture I show each word at least 4 times.
**Due to recent experience with stolen images, I have removed personal photos and videos. I would be happy to share them privately if we are friends.**
These particular words were flashed maybe 5 or 6 sessions before asking her to read Big Pig. Some of the words are review words, but I wanted to use a book that would be a good example for this post, as it’s long overdue. A friend said that you can buy this set of books at Costco, but I got it on amazon. This is one of our program activities, and is very effective in helping your child to read. The great thing is that it really gives her a sense of accomplishment when she can read an entire book herself. I try to go fast, but at the pace where she isn’t saying the previous word while looking at the new word. Make sense?
How to Make Flash Cards
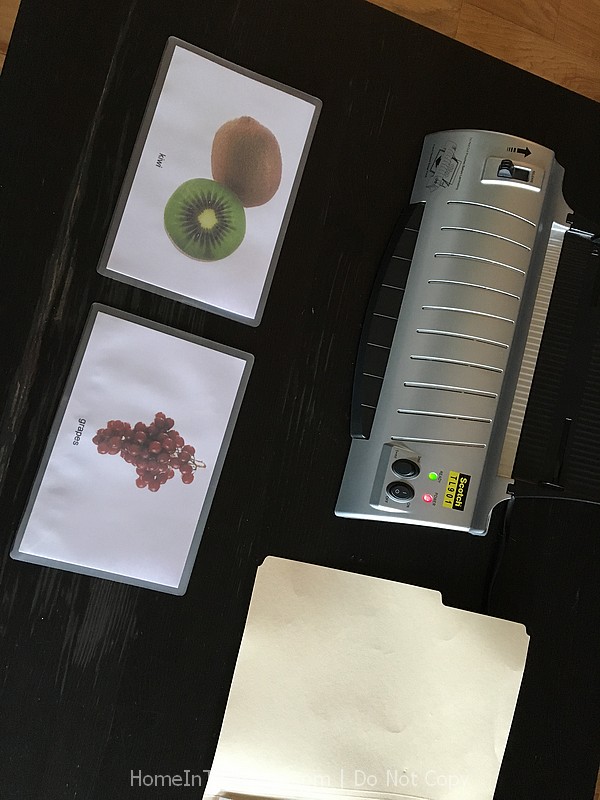
There are many options for making flash cards. Perhaps the simplest is to write words on index cards with a sharpie. I tried this, but I think printed cards are easier to read than my handwritten cards. And, I prefer to laminate the cards because they are easier to flip through and obviously much more durable. For laminating you also have several options, but I’m just going to focus on my method, which is to use a laminator.
To make the cards, I add the words to a spreadsheet, and then create a mail merge. I made a template for a folded style and for a half sheet. It was a hassle figuring out how to make a folded style because there is no easy way to flip text upside down! I use Photoshop for photo/word cards, but Word is much more efficient for word cards. I plan to upload some of my word flash cards in a later post, so stay tuned!
Flash Card Size
I toyed with making 4×6 or 5×7 flash cards because laminating pouches in those sizes are readily available. When I initially began making flash cards I used “letter size” sheets folded in half. I put two folded pages in an 8.5×11 laminating pouch, and then cut it in half after running it through my laminator. This worked well, but was time consuming. I had to make sure that each was positioned just right and then hold the pouch as it started to go through, so the top sheet didn’t fall on top of the bottom sheet. Then I had to cut each one in half and trim the sharp edges.
The problem with using 4×6 or 5×7 is that my printer doesn’t print on cardstock. You can find cardstock in those sizes, but I haven’t seen plain paper in those sizes. I could print on a regular sheet of paper and then cut it down to the right size, but that’s one more step. I have learned that the more steps involved the less likely I am to get it done. I also thought the text was too small on 4×6 cards.
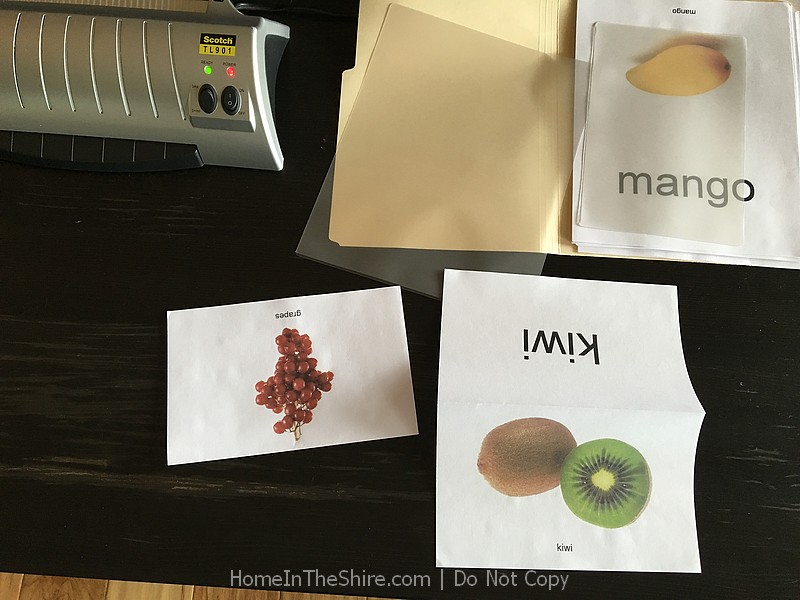
I am currently printing my photo/word cards on a single 8.5×11 sheet and folding it in half to make one card. My word cards I’ve been making on these 5.5×8.5 sheets. No more cutting. No more folding. I often flash the words holding them off to the side so that I can see the front of the card (unless I’m trying to make a video haha). Or, I use a sharpie and write it on the back. Or, lately, I’ve been making double sided cards, with a different font on the back than on the front for variety. Obviously this requires a full size sheet of paper. I’ve found that 24 lb paper is the perfect thickness so that my printer doesn’t jam up, but isn’t see-through. I found 6×9 laminating pouches on amazon, and they are the perfect size for a half sheet of letter paper.
Here you can see how I make my photo/word cards. I print on a single sheet of paper and fold it over. You can also see the two different options for laminating pouches.
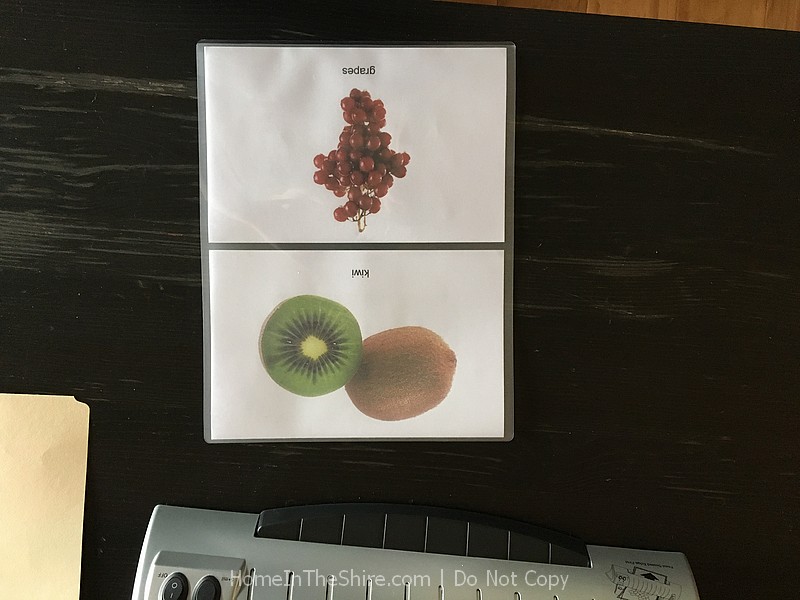
Here you can see that I’ve put two separate folded flash cards into a letter size laminating pouch.
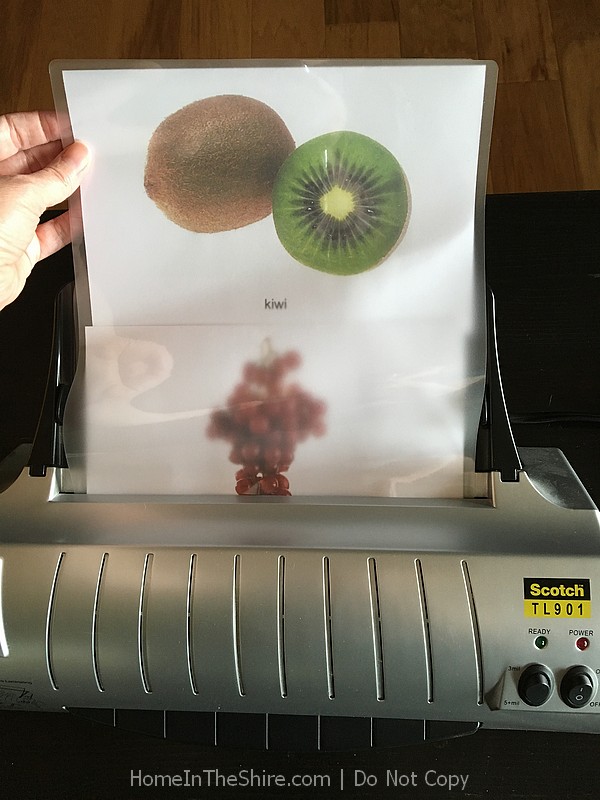
Difficult to tell in the picture, but I have to hold the laminating pouch while it starts to go through, to keep the sheets separated. See how the top sheet is starting to slide down? As long as you aren’t trying to take a picture at the same time (LOL) you can hold it until the laminator grabs it and starts pulling it through. I turned off the laminator so I could show you the new pouches I use.
After it comes out I cut it in half to make two separate flash cards and then round the sharp corners with a corner rounder or scissors.
Half sheet laminating pouches. NO MORE CUTTING! No more holding the sheet while it starts to go through! And no sharp edges to round!
Flash Card Font
I print my cards with around 125 pt font, depending on how long the words are. If you print directly from the BrillKids program it resizes each word to fill the page. However, I prefer for all the words in a set to be the same size. So, I figure out the largest font I can use for all the words in the set I am printing.
Flash Card Storage
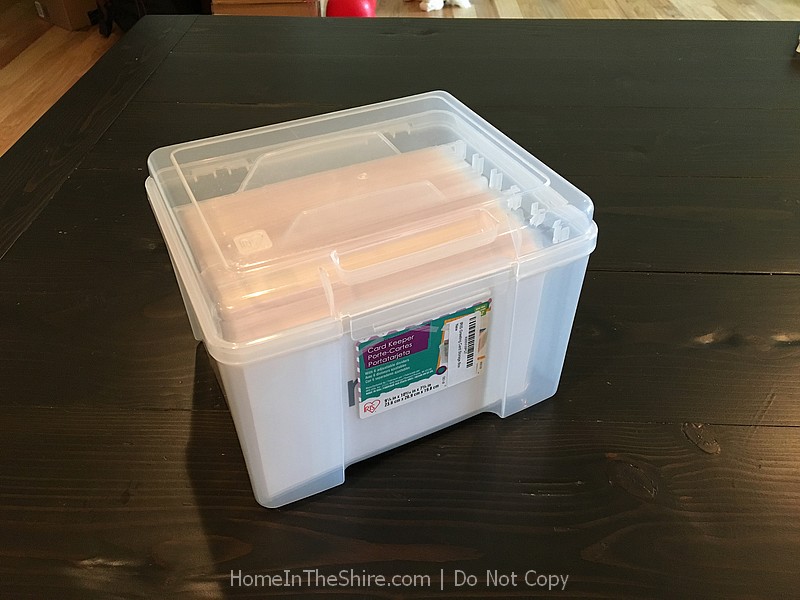
Once you’ve made a couple sets of flash cards you are going to realize that you need a place to keep them. For a long time, I kept them stacked with rubber bands. Recently though I found the PERFECT flash card storage box for 6×9 flash cards (this is standard letter paper folded/cut in half horizontally). I looked at soooo many products on amazon, as well as in craft stores. I compared measurements and prices, and ultimately decided this was the best one. I love it because it fits our flash cards without being too wide. It comes with removable dividers, which are great for separating cards you are currently working from review cards. You could separate into different sets too. For example, we now have flash cards in conjunction with books on our ND program. This means we make flash cards of words in books and then have her read the words in the books (as in the video above). So, I might have more than one book that we’re working on, and I can keep the cards separate that way.
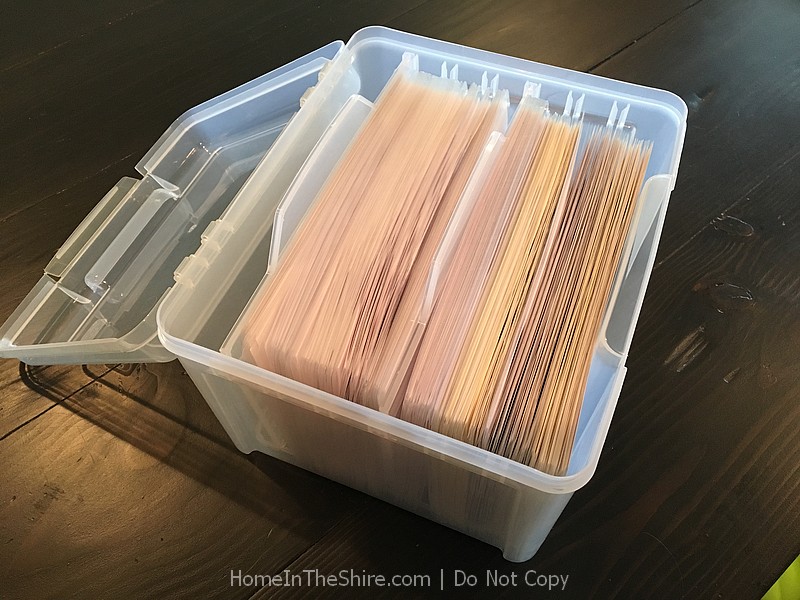
I just got a couple of these boxes, so I haven’t even labeled the dividers, and I’m sure I’ll be tweaking how best to keep them organized. But the size is absolutely perfect for my flash cards. The only thing that could make this flash card box better would be handles on the sides to make it easier to carry. Though then it would take up more space, so maybe it’s better there are no handles. In this photo there are over 250 cards, and you can see there’s still room for more. These are also fairly thick cards because I’m using 24 lb paper folded in two and some of them are 5 mil laminating pouches.
This box is so awesome! Not too big, not too small…just right!
You can see the dividers here. They are removeable.
Laminating Pouches
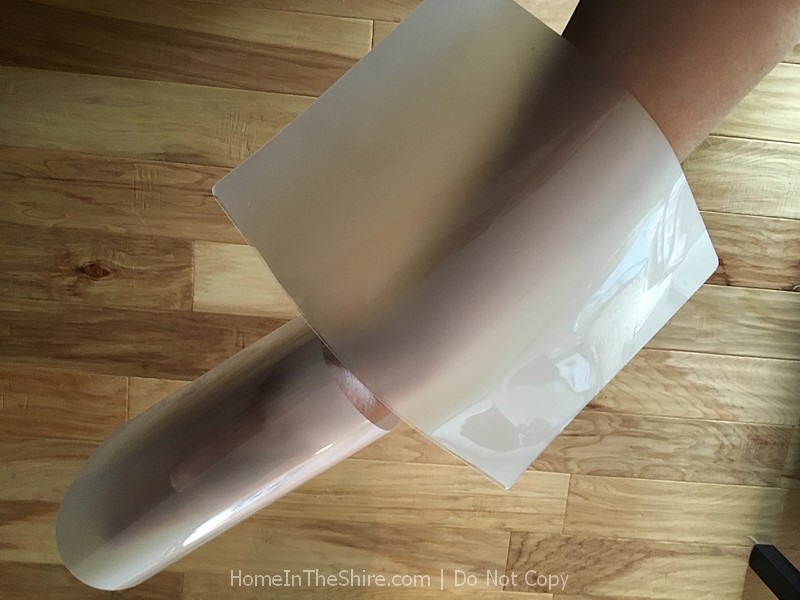
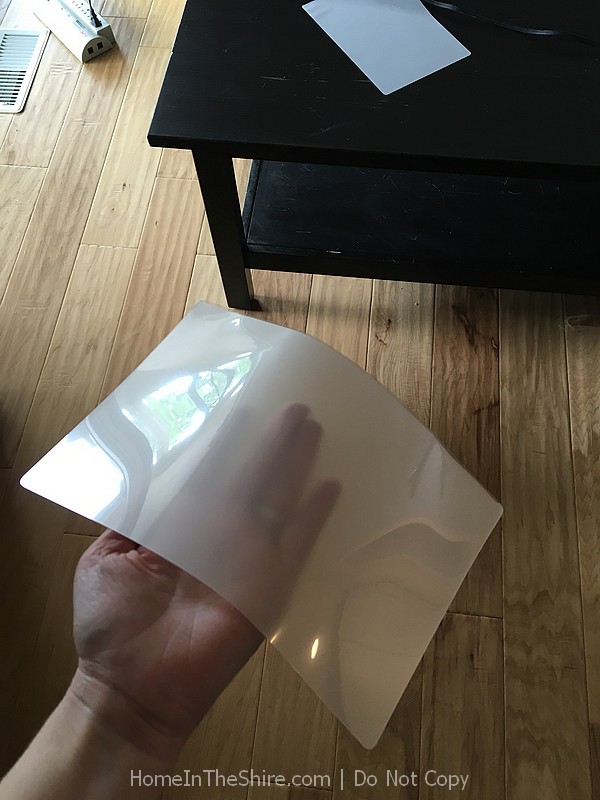
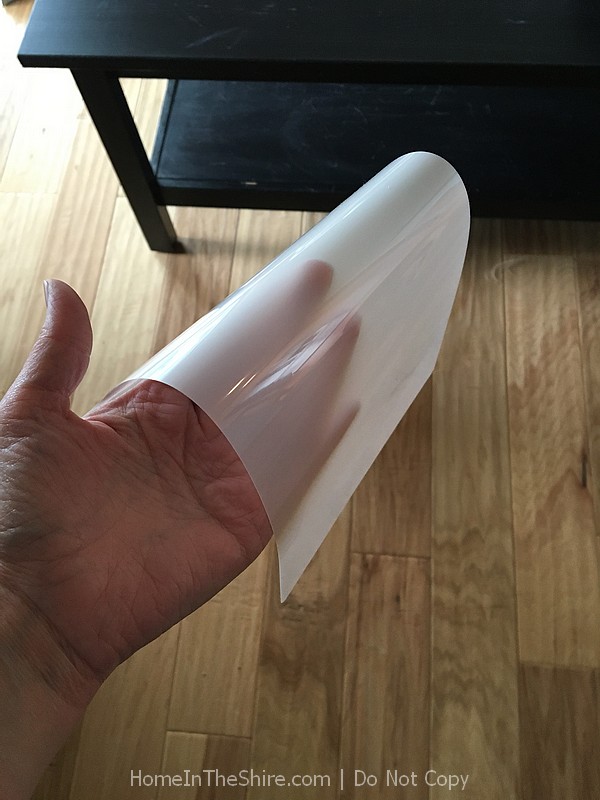
Speaking of thickness of laminating pouches. I initially thought I would prefer the thicker pouches, but it turns out that I much prefer the 3mil pouches. I find the more rigid cards aren’t as easy to flash.
Here I tried to take pics to show you the difference with the pouches before being laminated. 5 mil almost lays flat, whereas the 3mil is super floppy as you can see.
5mil (I was gonna crop this photo, but a certain friend has been asking when I’m going to share this, so you get the uncropped photo in all its splendor 😉
3mil (See how much flimsier it is? Don’t let that fool you. It works great for flash cards.)
Keeping Track of Words
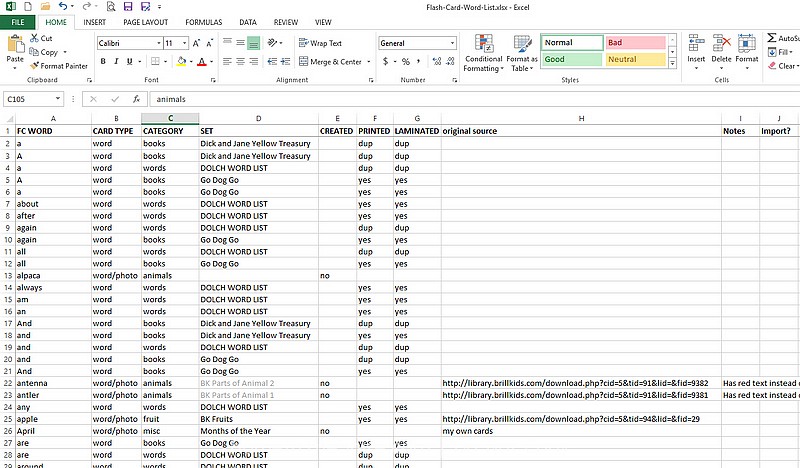
When I started making flash cards I didn’t keep track of which words I’d already made cards. Recently I wished that I had because I don’t want to waste time or money making cards that we’ve already got. So, I made a master list of words. I included the word, the set it belongs to, the type of card (word only or word/photo), category (eg. animals, fruit), source, whether the card was already created (or a word that I want to put on a card later), and whether it’s been printed and laminated because sometimes I have a set of cards made digitally but haven’t printed yet, or printed but not yet laminated. I also keep track of whether a word is a duplicate so that I don’t make it again. So, when I want to make a new set of cards, for a book for example, I go through and type in all the words, regardless of whether I know we already have a flash card for the word. So a word might be listed on my spreadsheet multiple times, but after I input the new words I go through and mark whether it’s a duplicate or not, so that I don’t remake the card. If I don’t do that, I get this 😉 Yep, those are cards that I made more than once.
This is what my spreadsheet looks like. If I think of a word I want to make for a flash card (like alpaca) I add it to the spreadsheet for when I have time to sit down and make a new set. I can filter and sort however I like, and I must say it allows me to reminisce about another life pre-kids when I was a Database Analyst. I kinda like that I can continue to use some of those rusty skills 😉
To summarize, I make two kinds of flash cards for reading: word only and word/photo. My cards are all 5.5×8.5 (half a letter size sheet of paper). I laminate them myself and keep track in a spreadsheet. In a later post I’ll share some PDF files of flash cards I’ve made and I’ll share my excel spreadsheet if anyone is interested. Drop a comment below if you’d like a copy of my spreadsheet.
Resources Used
Heavier Inkjet Paper 24 lb (slightly heavier than standard copy paper)
HP Instant Ink is my favorite way to print – best thing invented for homeschoolers since the laminator! Follow my link and we both get a month free.
Note: This post contains affiliate links. I spend a lot of time on all of this, and extra time writing it up and making things “shareable.” I don’t profit from this blog, but my hope is that it might one day pay for itself, so I always appreciate when people order from amazon through the links I share 🙂

One Comment
Toni
From a Mummy of three, the youngest two of whom have Down Syndrome; I thank you.